Getting Started
The Tandem APIs lets you embed the Tandem Viewer, on your own webpage.
To get a basic ‘hello world’ example up and running, we need to setup 3-legged Authentication.
This involves 3 things:
- Creating a Forge
Accountand ForgeKey - Adding
Permissionsto Tandem - Creating a simple
"Hello World"Tandem Viewer
Creating a Forge Account and Forge Key
Forge Account
If you don’t have a Forge account yet, sign up for one on https://forge.autodesk.com.
You can take advantage of a trial subscription that is valid for 3 months.

Forge Key
In order to authenticate to the Tandem platform, we need a Forge Key (ie. a client ID & client Secret).
Click “Go to My Apps” …

Then click “Create App” …

Fill in name, description with anything you like (ie. hello world).
In the Callback URL add http://localhost:8000

Scroll to the bottom and click Create App and you’ll see your newly generated Forge Key (Client ID and Client Secret)
Record the Client ID, you’ll need this in the last step.

Adding permissions to Tandem
Next, let’s setup Tandem.
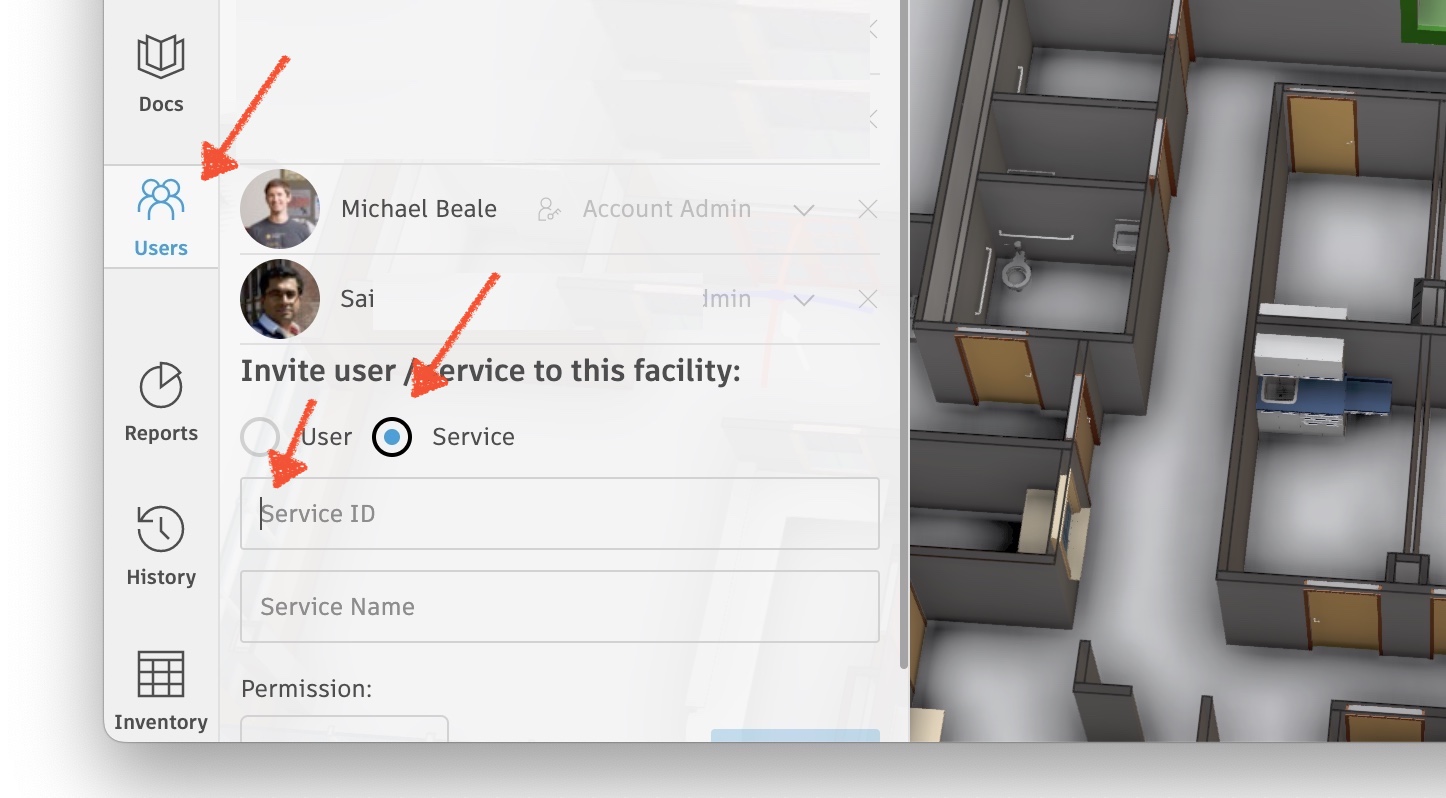
We will add our Forge ID, as a User, to an existing Tandem Facility and give them 'Read Only' permissions.
- Open any Tandem Facility
- Select
Users - Tick [x]
Service

Next,
- in the
Service IDfield, add your ForgeClient ID - in the
Service Namefield, add anything (ie.Hello World) - Scroll down and click Add
Creating a simple "Hello World" Tandem Viewer
Finally, let’s create a simple "Hello World" webpage, containing a bare-bones Tandem Viewer, that shows our facility.
Click ‘Hello World’ tutorial to continue.